Summer Glow: Self-Tanning Tips and Tricks
Your step-by-step guide
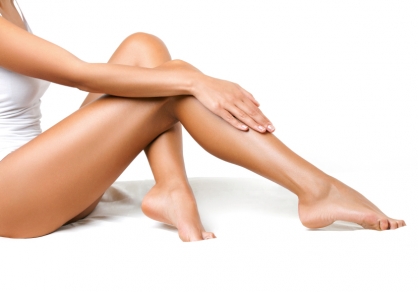
Nearly everyone has tried self-tanner at some point, but no matter how much you’ve used it, there are always new tips and tricks to learn to achieve a more perfect summer glow.
And of course, there are always amazing new products coming out that can make a real difference in the end result. Avoid common mistakes and you’ll come out looking gorgeous.
Avoid the orange
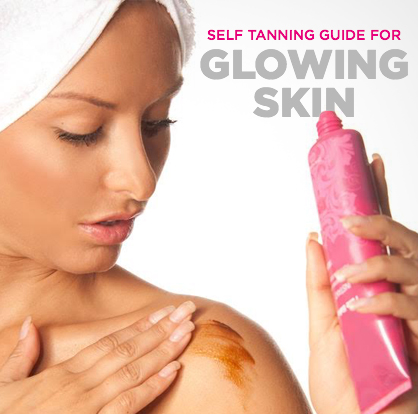
Unfortunately, one of the worst self-tanner offenses is when your skin appears orange. This happens because most self-tanners contain dihydroxyacetone (DHA), a colorless sugar that interacts with the top layer of skin to give a tanned appearance. The resulting orange tint is usually due to an oversaturation of DHA, which can occur when you use too much self-tanner, or use a self-tanner with a higher percentage of DHA than what will work with your skin tone and type.
To avoid this, try Trilogy’s Instant Bronzing Gel. It is quick and delivers instant color on application because it’s enhanced with light reflecting mineral mica and actually contains caramel which gives it an amazing scent. It gives you an instant bronzed look, and the glow will deepen over a few hours as the DHA takes effect. Use for multiple days to build up a darker, more natural-looking tan.
Another excellent product is from Skin Authority. It doesn’t orange on any skin type, and it doesn’t streak, smell or stain. Tip: If you have very light skin, mix with a bit of lotion to dilute the original formulation. Skin Authority CEO and founder Celeste Hilling shares her best tips in this how-to video.
Step-by-step process
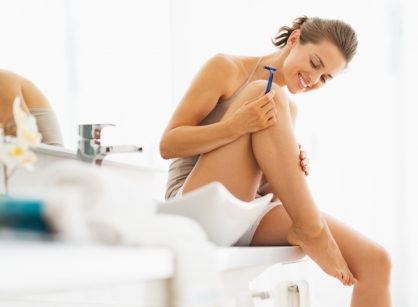
When you’re ready to apply self-tanner, start first by shaving your legs and then exfoliating, paying extra attention to rough patches on elbows and knees. Try the Dermasuri deep exfoliating mitts to remove dead skin cells and prep your skin for tanning. It’s fast and extremely effective.
Molly Leahy, bridal hair and makeup artist at Blushing Brides in Boston, has worked with many brides for their wedding day, and is a self-tanning expert. After shaving and exfollating, she recommends these steps:
Self tanner can be a huge help in the summer to give you a healthy glow without having to expose your skin to sun damage. However, some of the biggest problems people have when using self-tanner is that they get streaky, turn orange and stain everything they wear. So here is how to properly apply self tanner to avoid common mistakes.
- Apply after you get out of the shower because your pores are more open and it seeps deeper into your skin making it last longer. Don't apply a lotion to your body before you apply self-tanner because it will create a barrier that stops the self tanner from sticking to your skin. The only exception to this rule could be your elbows and knees if they are still a little dry to make sure they don't over absorb.
- Apply the self-tanner in sweeping circular motions in the direction that the body hair is going. Start with the arms, then move on to the chest, shoulders, neck and legs.
- When it comes to your face there are specific tanning products meant for the face since the skin there is more delicate but you can also achieve a similar effect by mixing a small amount of self-tanner in with your face moisturizer. You should apply to your face approximately every other time you apply self-tanner to your body.
- After applying, clean your hands by taking hand soap mixed with a whitening toothpaste and rub your palms together. If necessary, you can use a washcloth to exfoliate more.
Extra tips
Dera Enochson, creator of Xen-Tan, shared her tips for a truly professional-looking self tan:
- Tan your breasts bigger and your tummy flatter. It's easy to do with a little practice. Just like you pick out clothing to flatter your figure use your self-tan to do the same when you are naked. If you have some areas you wish were smaller give them a second coat. Darker skin makes the areas look smaller. It's subtle, but true. Then go a little lighter in areas you want to look bigger. You can contour your chest a little by going a bit deeper right under the breasts and in your cleavage and keeping the breasts lighter. You'll be surprised at the effect. After you tan your stomach go back with a gloved finger and slide on a thick bit of lotion under each rib to make them shaded in a bit darker. Tons of celebrities do it and you'll be surprised how flattering it is. You don't need a professional to do it for you if you practice a couple times.
- Blend out the self-tanner lightly over your feet, hands, face and throat. Thinner areas of skin need less product.
- Pick a gradual tanner if you are not the best at applying self-tanner or feel uneasy doing it. Graduals are fabulous. You can do a little every other day, or every day, to tan and provide moisture. If you are not the best at applying tanners but you love to stay tan this is a great option. Each coat will layer and adjust any spots you missed the day before so you can look gorgeously tanned every day and it just takes the place of your body moisturizer. Give yourself a few days to be sure your tan is at its best. Graduals also seem to hold up better than other sunless tans when you swim. I make sure to take just 15 minute dips, or less, and then gently pat dry to make sure not to lose color.
- If you have darker skin do opt for a light self-tanning formula. Instead of making the skin darker it gives a richer, warmer tone while moisturizing and hiding whitish flakes of dry skin on knees and elbows. And if you have fair skin, opt for a darker self-tanner as it looks best and most natural on fair skin.
- Pick a self-tanner based on texture. You are going to get tan in the end so it's all about how you get there. Are you dry and feeling flaky? Use a rich lotion. Do you have a new dress for work and need tan legs this minute? Use a liquid, or fast dry mousse. I am not a fan of sprays because they leave a big mess behind to clean up, but if you just spray them on a mitt and blend them on the skin they can be fantastic, and no drips on your legs, or mess all over your shower walls. If you are new to tanning? Try a mousse. Always use instant color so you can see where you are putting the product until you get used to application.
- Before tanning, be careful and don’t use anything with oil or moisturizing products. It will get in the way of your tan. Self-tan needs to get right down to your skin without something blocking it. Definitely skip moisturizers and even make sure your body scrub isn't an oil base. If you use retinol products or anything similar you may find your tan is gone shortly after you apply them. I recommend using your retinol product at bedtime and your tanner during the day so you keep some color in the day.
- Don't blend too much. Just remember that everywhere you put the tanner is where you are going to be tan. Most self-tanners these days are streak-free. One of the most important things to remember (and this accounts for most of the streaking) is trying to blend too much can cause the product to grab in spots and pull away from other areas. Self-tan is meant to glide over the skin like you are frosting a cake. If you are “rubbing it in” to the skin you are concentrating too much pressure. Just picture an angel food cake and you are frosting it.
- Don't let your tan get patchy. Apply moisturizer every day when you are not tanning.
- Don't panic and scrub your skin if you make a self-tan mistake. Just take a long warm shower, buff off any excess color that you can gently remove with your washcloth and then re-tan when you are dry. The second layer will hide most flaws. Soak palms of hands in soapy water while you watch a favorite reality show to get excess color off palms and next time use a mitt to apply.